Are you stuck behind a corporate or school firewall that prevents you from getting to sites you want to visit?
Don't want to have to logon with a user name and password to be able to browse, and don't want to leave traces?
Sick of corporate spies or school gestapo agents looking at their logs watching what site you have been to etc?
Well want no more, the reason these fascists can block sites and view logs of the sites you have been to and how long you spend on the internet each day browsing is because they are using a proxy server.
A proxy server is a means of control, I won't go into detail of what proxy servers can do, just do a search and you will find out.
But ironically, your freedom is to use a proxy server.
The proxy server which is FREE and easy to set up is called Proxomitron and you can get it from here, Proxomitron
You install and run this on your home computer.
Then at work/school you go into your browsers proxy settings configuration page and enter your home IP address and the port number you used.
It looks like this,
It is easy enough to set up, but here are the main things to look for,
I use port 22 as nearly all corporate or school systems allow port 22 alone. Port 22 is for SSH. This also gives you the added benefit of connecting to your proxy through using FreeSSHd.
Port 443 might also work.
This works a treat for me.
Wednesday, October 31, 2007
Saturday, September 15, 2007
Tuesday, September 11, 2007
Thinstall
Thinstall Website
Key Features
* Single EXE runs from network or offline desktop
* Simple to use, package & deploy in minutes
* No infrastructure changes: deploy with existing systems
* Runs exclusively in User-mode, no device drivers
* Application streaming with no client or server required
* Windows Vista ready – instant migration
* Runs on Terminal Server and MetaFrame (32bit & 64bit)
* Isolation of Filesystem & registryeliminates conflicts
* Upgrade applications while they are still running
* Sandboxing protects machines against modifications
* Supports most Windows applications
* Supports Side-by-Side (SxS) DLL deployments
* Plus many more: Click here for full Feature List
This site has lots of pre-made appz.
Friday, August 24, 2007
UnLocker
Ever get that annoying message?
It has many other flavors:
Cannot delete file: Access is denied
There has been a sharing violation.
The source or destination file may be in use.
The file is in use by another program or user.
Make sure the disk is not full or write-protected and that the file is not currently in use
UnLocker is a nifty util that gets around that problem.
Download from this website.
Direct link to file here.
Saturday, August 18, 2007
VUE 6
Pronounced "View 6" is an awesome 3D package.
Website
You can d/l their FREE version called PLE (Personal Learning Edition) here. It is fully functional, it just has a watermark on the renders you make.
There are several versions, the ones you want are either;
a) - VUE6 Xstream
b) - VUE6 Infinite
Get Xstream if you use another 3d package such as Cinema4d, Maya, Lightwave,Max etc., and Xstream will integrate with them.
Get Infinite if you don't already have a 3d program and Infinite is a stand-a-lone 3d package.
Wednesday, August 15, 2007
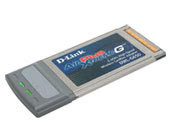
BSOD with DWL G650
If you are getting the Blue Screen Of Death (BSOD) with your Dlink wireless network card, in my case the DWL G650 but other models get it to. It's based on a dodgey AR5211.sys driver which is an older Atheros driver. The solution is the following;
OPTION 1
The following steps may solve this problem in versions of Windows XP:
In preparation for these steps:
A. Download the latest version of the DWL-G630 drivers from support.dlink.com.
B. Consider setting a Restore Point. For additional information about System Restore, click Start, click Help and Support, type system restore in the Search box, and then press ENTER.
1. Go to Add/Remove Software
2. Remove your G630 software
3. In Explorer, go to %windir%\system32\drivers and, if you see AR5211.sys, rename it to AR5211.old. (Note: it may have already been deleted by Step 2, above.).
4. Reboot your computer and log on
5. If Add/Remove Hardware wizard comes back up, choose Cancel
6. Install the latest DWL-G630 software that you downloaded earlier.
7. The software should install and your network card should now be enabled or detected. If it is, proceed normally. If it is not...
8. ...Click Start, Run, and run compmgmt.msc and open Device Manager ... click the name of your computer at the top of the tree, then click the icon to scan for new hardware
This worked for me.
OPTION 2
Even better solution is to go to this website and check if your card is in the compatibility list. If it is then download the latest Atheros driver and install that.
I'm using Atheros drivers intead of D-Link drivers on D-Link DWL-G650.
Atheros drivers supports 54Mbps in ad-hoc mode (D-Link drivers only 11Mbps).
Atheros drivers are much better when there is no line of sight between antennas.
I've got up to 150KB/s with D-Link drivers and up to 1500KB/s with Atheros.
It is a bit complicated to setup once installed, so if you are in no way technically minded then don't do this and stick with OPTION 1
Just remember:
1) BEFORE you do this,UN-INSTALL any previous D-Link drivers (using Device Manager)
2) PULL OUT the card
3) SHUT DOWN
4) Install the Atheros drivers by running Setup.exe from EXTRACT directory
5) and ONLY THEN insert the card (that's really important)
Sunday, August 12, 2007
Send To Toys
One of my favorite tools, one that I usually install right after finishing setting up any new system.
Send To Toys is an enhancement of the Send To system menu. It has many nice features including:
* Send To Toys Control Panel Applet allows you to manage the Send To system menu content, and configure Send To Toys settings.
* "Add to Send To menu" and "Remove from Send To menu" allows you to personalize the Send To system menu for drives, folders, and programs.
* Send To "Clipboard (as name)" copies the name of the file or files to the clipboard. Hold down the CTRL key to change the settings for this extension.
* Send To "Command Prompt" opens a DOS console window, setting the current directory to the selected folder. If the selection was a file, the folder containing the file will be the active directory and the name of the file will be typed for you at the prompt. Hold down the CTRL key to change the active directory to a different folder
* Send To "Favorites" adds a shortcut to your Favorites list. Hold down the CTRL key for the "Add Favorite" dialog.
* Send To "Folder..." sends a file or files to another folder, you will be shown a dialog box that lets you choose where the files should be copied. To move the files press and hold down the SHIFT key. The creation of a new folder is not supported on Windows 95, 98, and NT.
* Send To "Recycle Bin" send a file or files to the Recycle Bin. Hold down the CTRL key to perform a file shredding.
* Send To "Run..." sends a file or files to the Run command dialog
Send to Toys is freeware and can be installed on any version of Windows.
sendto.exe. <----Download here
Wednesday, August 8, 2007
Download videos from MySpace
If you want to d/l videos from myspace, youtube, google videos etc., there are 2 ways that work well
#1 the best way is to get a util called vdownloader (google for it) you don't need to install it and it converts the flv video into avi, mpg, mp4 etc., for you. This works well for MySpace videos.
#2 go to websites like
http://keepvid.com/
http://javimoya.com/blog/youtube_en.php
#1 the best way is to get a util called vdownloader (google for it) you don't need to install it and it converts the flv video into avi, mpg, mp4 etc., for you. This works well for MySpace videos.
#2 go to websites like
http://keepvid.com/
http://javimoya.com/blog/youtube_en.php
Tuesday, August 7, 2007
nVidia nforce NIC for ghostcast server
If you are having a bastard of a time finding ndis drivers for your nvidia nforce network card to use with Ghost Cast server then get this. Nvidia Nforce
This is my big boot4.11.ima I use this on bootable ghost images in Nero
The file is a .IMA file and is in 2.88 meg Floppy format. I use it with Nero to make a bootable CD that lets me boot computers with a working network connection and connects to the GhostCast server.
If you want to use it as a floppy, then you will need to get WinImage which makes .IMA files and extract the files.
You need to make 2 floppies. On the 1st floppy keep the exact file structure but don't have the ghost.exe in the Ghost dir.
On floppy 2, put the ghost.exe in the ghost dir
Subscribe to:
Posts (Atom)